Looking for the main page? Here’s the It’s For A Story fiction directory.
Sometimes you wonder if parents are doing “kid projects” more for themselves than for their children. Although this was definitely appreciated by the girls and neither of them has willingly taken the dresses off all week, there’s no need to wonder on this one. I will admit up front that my husband and I both miss having time for old hobbies, and Halloween is one of the few opportunities we get for them. For me—it was costuming. Historical, vintage, cosplay, I was into everything in my early twenties. But life moves on, and for a while I had to put the design notebook away.
Since I’ve been able to get back into dressmaking to some extent, I've used Halloween as my annual prod to get my daughters’ basic pattern blocks drafted. I get the block stored away so I don’t need to do a whole week of fittings later, and they get nice-looking costumes sturdy enough to last all year. It’s a tedious process, and I really didn’t want to do it this time—I had ballerina dresses from Amazon all lined up and ready to go. By some miracle, though, they asked to be Vikings instead. And even though there were less than three weeks until Halloween, I said yes…because Vikings don’t need patterns.

See, the guiding principle of preindustrial clothing is ‘you get exactly as much dress as fits on this piece of fabric I wove’. Early eras are characterized by draped or seamed rectangles, often pleated to manage fullness (toga, peplos, qun, kaftan, etc.) so that no fabric is wasted at all. As shaped clothing becomes more widespread in Europe, the width limitations of the local loom technology combine with the precious nature of handmade fabric to produce ingenious arrangements of seams, gussets, and gores.1 Handcrafted History (Linda) has a tutorial for a reconstruction of an Iron Age dress found in Eura, Finland that fascinates me as the only scraps produced are from cutting away at the neckline.
By the early medieval era, with the fabric industry increasing access to higher-quality and wider cloth, inset sleeves with shaped caps are definitely the norm. You end up with more off-cuts, but those can often be repurposed, and the finished product fits much more closely to the body. Still, the reconstructed cutting diagrams are incredibly tight by post-industrial standards, and I’ve wanted to try out something like this for ages.
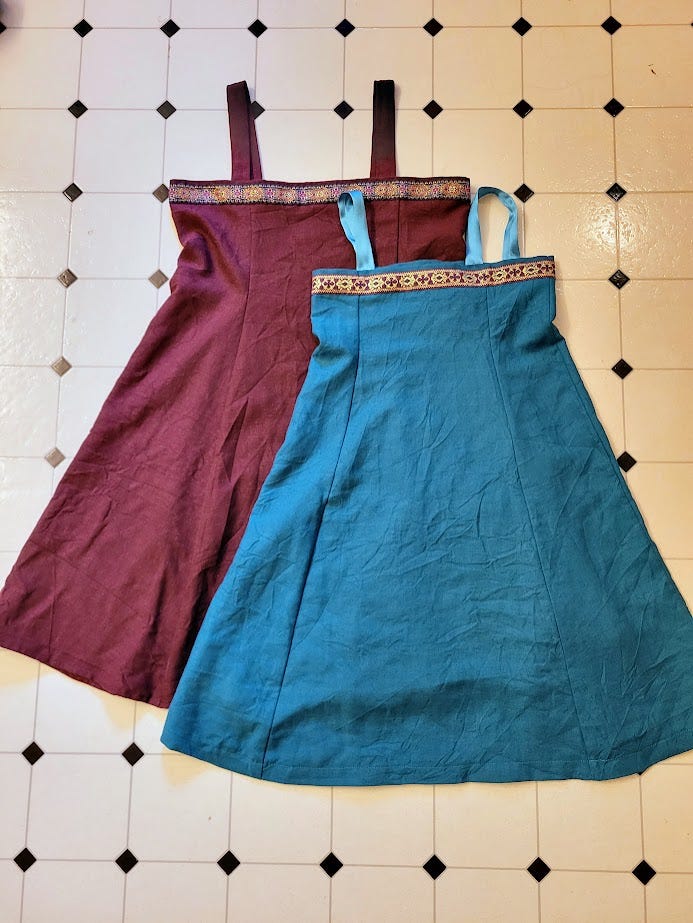
Disclaimer: I paid no mind to actual historical accuracy. There is no serk/shift. Glittery plastic beads and polyester ribbon are involved. The sewing techniques are ghastly. Et cetera. But doesn’t it look good!
Each outfit has four components: kirtle, hangerok, jewelry, and weapons. Because this whole thing got started when Rogue started bending coat hangers into bows so that she could “be a Viking and shoot monsters”, their dad had the weapons part handled (gleefully, might I add.) That left the sewing and much of the jewelry-making for me.

Dresses (Kirtles)
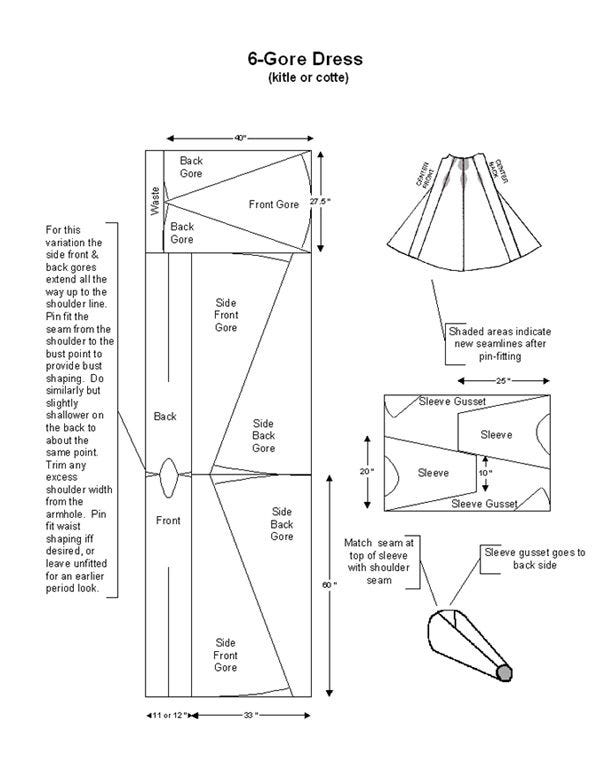
I based my method on Linda’s tutorial for an all-purpose medieval dress. I wouldn’t say it’s for new dressmakers, but only because it’s easy to mess up if you don’t know what you’re doing already with sleeves and armscyes. In the end, even though the genius of the S-sleeves is that you can make them out of one long rectangle with the sleeve caps slotting together like puzzle pieces in the middle, I was really nervous about trying them with such a tight timeline. I normally make mockups and this fabric was only relatively affordable (total for fabric and beads came out around $35 each, because I hit such a good sale. This is basically what premade costumes cost now, but I had to think about my time too.) I drafted a modern sleeve instead, with an extra-loose bicep to allow for lots of movement and growing room.

Actually, to be completely honest, I cheated with the sleeves even by modern standards. These dresses were each a two-day process with most of the construction and fitting on Day One, and sleeves and finishing on Day Two. I don’t enjoy setting in sleeves at the best of times, and by that second day I was just done. I chalked out the curve by eye and set them in with ad-hoc inverted box pleats so that it wouldn’t matter that the sleeve caps were too big. And it looks fine. Shhhh.

Sizing down the triangular gores didn’t immediately make sense to me, but after some thought I realized that their purpose is to roughly triple the waist measurement at the hem. Therefore, each gore’s width should be within an inch or two of a single front/back panel’s. [Four gores and two panels to make the whole; 4w + 2w = 6w, and of course 6w = 3(2w).] By cutting them inverted, you then only need a block of fabric as wide as two gores and as long as one.
I usually try to do as little seam finishing as possible, either by using knit fabrics, lining the garment, or both. Neither were options this time, so (for time’s sake) I just zigzagged over all raw edges before seaming, since the weave isn’t firm enough for pinking. If that doesn’t last, I’ll go back and probably fold over the seam allowances and sew them together. The ideal solution would be to serge them, but while I do have a serger…and a bunch of thread…because everyone cleaning out their houses thinks of me when they see anything sewing-related, for which I’m very grateful!…I have not yet figured out how to use it. Maybe this time.
Apron Dresses (Hangerok)
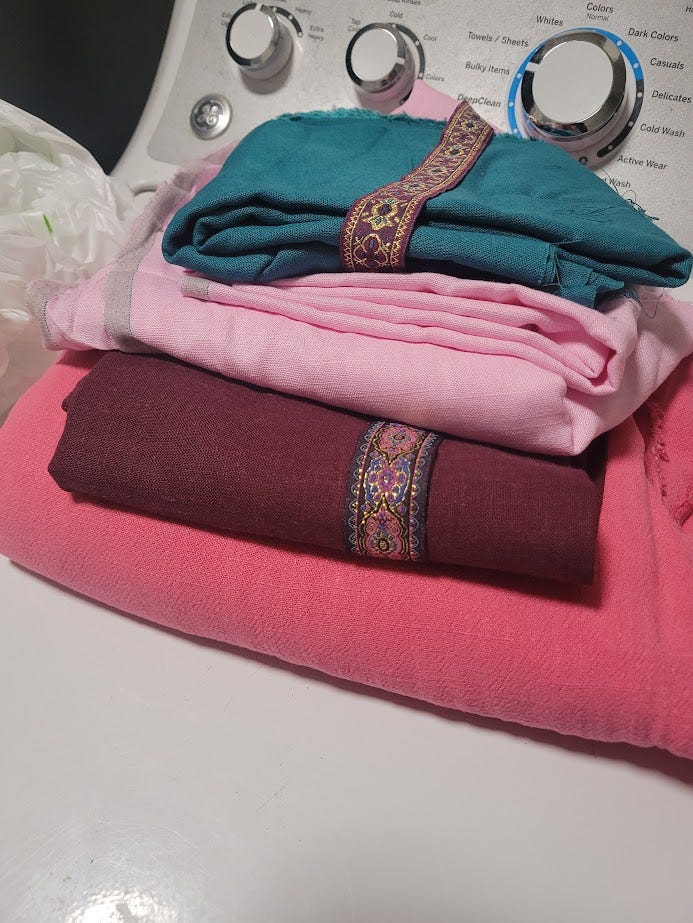
The apron dress, along with the oval brooches that hold it up, is the characteristic piece of clothing for Norsewomen of the Viking Age. Although the kirtle worn alone is perfectly accurate for daily wear, adding the apron dress is what distinguishes it from other early-medieval looks. You can get very creative with these, but I went with a basic design, again using one of Linda’s tutorials. I sized it down using the bust and waist measurements to generate a hem measurement of about 2.5x the waist, and using a half-width of the fabric as the length. That way, I got Barbarian’s into one yard without having to do any piecing on the panels. (Required fabric width: ((bust/2) + (2.5*(waist/2)) + (8*seam allowance))/2.) I wasn’t quite so fortunate with Rogue’s, having bought a shorter piece that turned out to be both shrink-happy and cut very crookedly. That’s what I get for not ordering ahead of time from a better supplier, but I used to be able to get good fabric in-person and when I’m in a pinch I always forget how far downhill the quality has gone.

This time I went ahead and did French seams, since it’s all straight lines with no gores or armscyes to complicate matters.
(Of course, with French seams you’re really stuck if you don’t do it right the first time. My best advice for when you accidentally seam the two pieced panels together, instead of with a plain one in the middle, is to put a tiny tuck down the center of the plain panel so it looks like they’re all pieced. I do not have any advice for when you start the next French seam backwards entirely and don’t notice until after you’ve trimmed it down, which is something I’m contractually obligated to do once per project but had thought I was going to get away without this time since there were literally only two left. That was where I went and took a three-hour nap before I came back to fix it and try again.)
Anyway, then it’s just hemming the top and bottom, and on go the straps and the trim. I did Barbarian’s straps in self fabric, but ran out with Rogue’s and used some ribbon leftover from another project. It’s not that shiny in person, honest.

Jewelry
The garment name ‘hangerok’ refers specifically to the fact that the dress hangs from brooches. Historically, these would fasten to loops at both the ends of the straps and the top of the dress, making the length adjustable and the dress easy to don and doff. (If sewn-down straps become an issue, I might come back and put snaps in for a similar purpose.) When I first considered making these outfits, it was the characteristic oval brooches that gave me pause. How would I get the look? Replicas are really only made for the reenactor market, thus large and expensive (besides shipping times), and I had nothing like them on hand. Or did I?
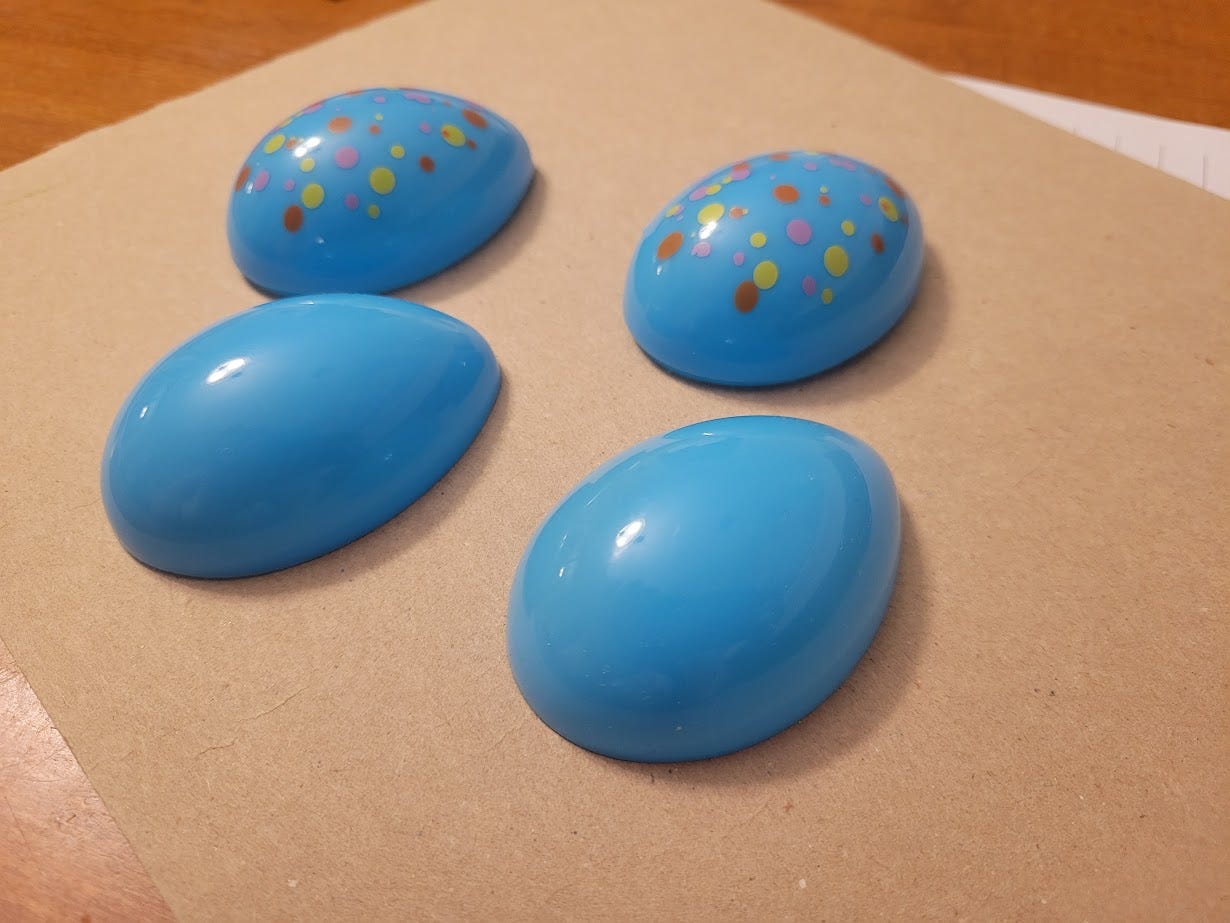
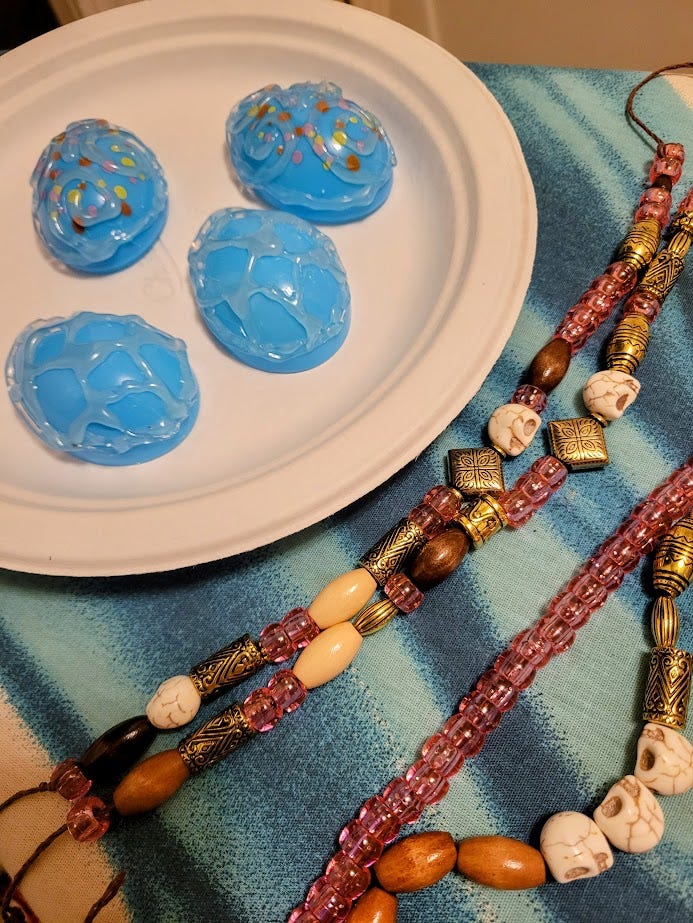
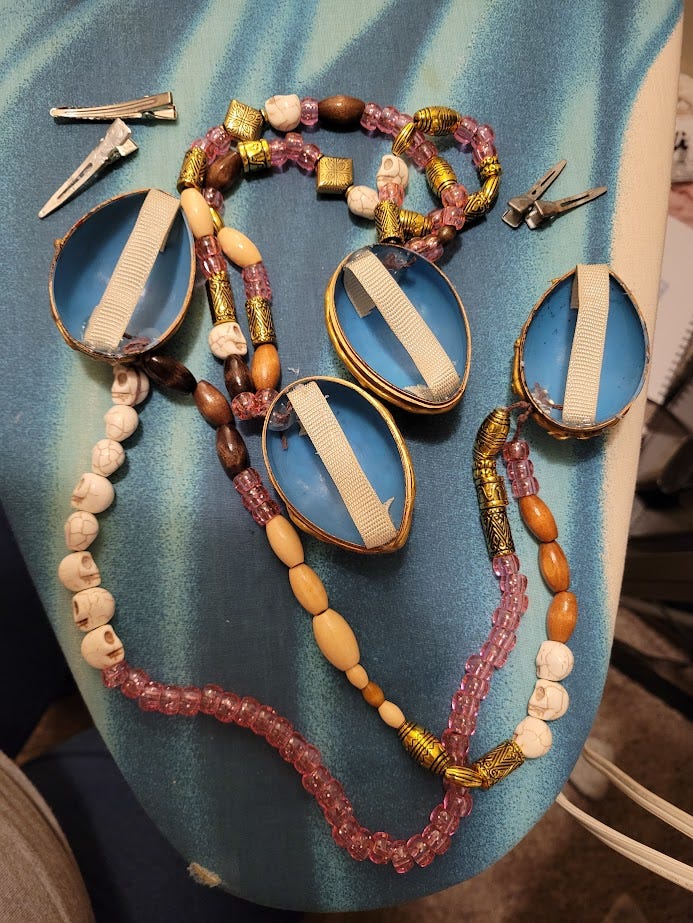
Just a few days before, I’d been cleaning up my closet and found two matching Easter eggs that—crucially—separated lengthwise instead of crosswise. I still feel exceptionally clever about this, because props have never been my thing. That’s Mr. Howard’s department…his back-burner hobby is custom gaming miniatures. If I had any illusions that this part of the costume would survive general dress-up use, he would have happily broken out the Green Stuff and done some proper sculpting for me, but in a rare fit of reason we decided that hot glue would be good enough.
There are no pictures of the beading process because while I expected to be just working with the girls, I somehow ended up with an extra 8-year-old as well as the toddler I’d desperately needed to keep away from tiny beads to begin with. Life happens. I let Barbarian handle her own designing, which is why you can tell which is which. With Rogue, I looked over to find she’d basically just covered the tray in beads, so I extracted a design by picking some of them up in roughly the order she’d put them down in. I think we hit the sweet spot between truly random (which always looks strange) and too strongly patterned.
For the brooches, after I’d made the raised design with hot glue, Mr. Howard took over and painted them (many…many layers were involved.) After that was dry, he drilled a small hole in each so that I could thread through the strings at the end of the beads and glue them down. I also glued strips of ribbon into the backs of the brooches to use as attachment points. This was a really good decision as even the toothy alligator clips turned out to be no match for active kids, so I was able to go with safety pins and had no issues.
So! There you have it. I hope this post was at least mildly diverting. Overall, I consider the project to be a massive success, as well as a confirmation that my idea of a reasonable workload is broken. (If you think this is cool, you should see the boat my dad designed and built…out back of the garage he designed and built…so that he could work on his project cars. No, he is not retired. My family just doesn’t know what ‘downtime’ means.)
Anyway, there’s always another chapter to write, I’m suddenly halfway through trying to whip up some Rogue-sized bloomers, and I’ve just been reminded that we have to leave for another weekend away…tomorrow. See you next week,
EB. ♥
This varied dramatically, by the way. A home weaver working alone was limited by the need to pass the shuttle from hand to hand in front of her—hence cloth widths that started at 14-16” (the distance between arms held loosely at the sides) but might go up to 36-48” (closer to the full usable armspan) if using a shuttle that could be thrown. Commercial weavers working to throw a shuttle back and forth in teams could go much wider; for example, the twelfth-century Assize of Measures standardizes woolen cloth at two ells, or about 74”, wide. If you vaguely recall “flying shuttle” from an Industrial Revolution history unit in school…this is why it was such a big deal. A flying shuttle removes those shuttle-throwing assistants from the equation and does the job faster, too.
An interesting starting point for looking into this (which is its own whole digression that I don’t have time for today) is tanmono, the narrow Japanese cloth-bolt which has literally shaped traditional clothing for centuries. Another is sari fabric, at the other end of the width spectrum.




I am in shock. Also love that your girls have dnd class internet names 😂
This is AMAZING. I didn’t understand about 75% of the technical sewing stuff, but I’m in awe of the process and the end result. Also, the DnD names make me so happy. 😂 I think our kiddos are just a troupe made up entirely of little barbarians. 😅
Also, I love your coasters.